Jason and I decided that we should do all the landscaping for the yard ourselves..save money and gain knowledge. We are pretty handy, especially Jason and we have watched countless hours of DIY and HGTV...Sounds good, right? We had a rough plan of what we wanted (pretty much every cool thing to have in your back yard) and hired a landscaper to draw it up. We started in mid March (as early as possible because of the frozen ground) and needed to be done by the end of May, when Jason deployed. By our estimations, this was enough time to accomplish our goals..ha ha ha..we seriously underestimated the time and money it would take to complete this project and the weather was a MESS! We worked through snow, hail, rain, heat, and LOTS OF WIND..some days the wind was 40 mph. We have spent just about every waking moment working on the yard, after work and on the weekends. The kids have helped a bit, but they are very good at disappearing back into the house. Frankly, there were many days I wanted to as well, but we had to push on. Our hands have endured countless blisters, abrasions, and numbness (I think it's some form of carpal tunnel from all the hole digging and hammer pounding)..I have decided that Jason and I are a perfectionists at heart and serious overachievers...the terms basic, simple, and good enough don't exist for us. Before this project, I had never done much more than weeding and planting a few flowers in the yard. Jason had built small decks in the past and thankfully knew how to work some pretty cool yard equipment. My how things have changed for us! Enjoy the pictures of our hard work..we hope to be enjoying the completed yard soon!

In the beginning...the front

and the back....blisters here we come!
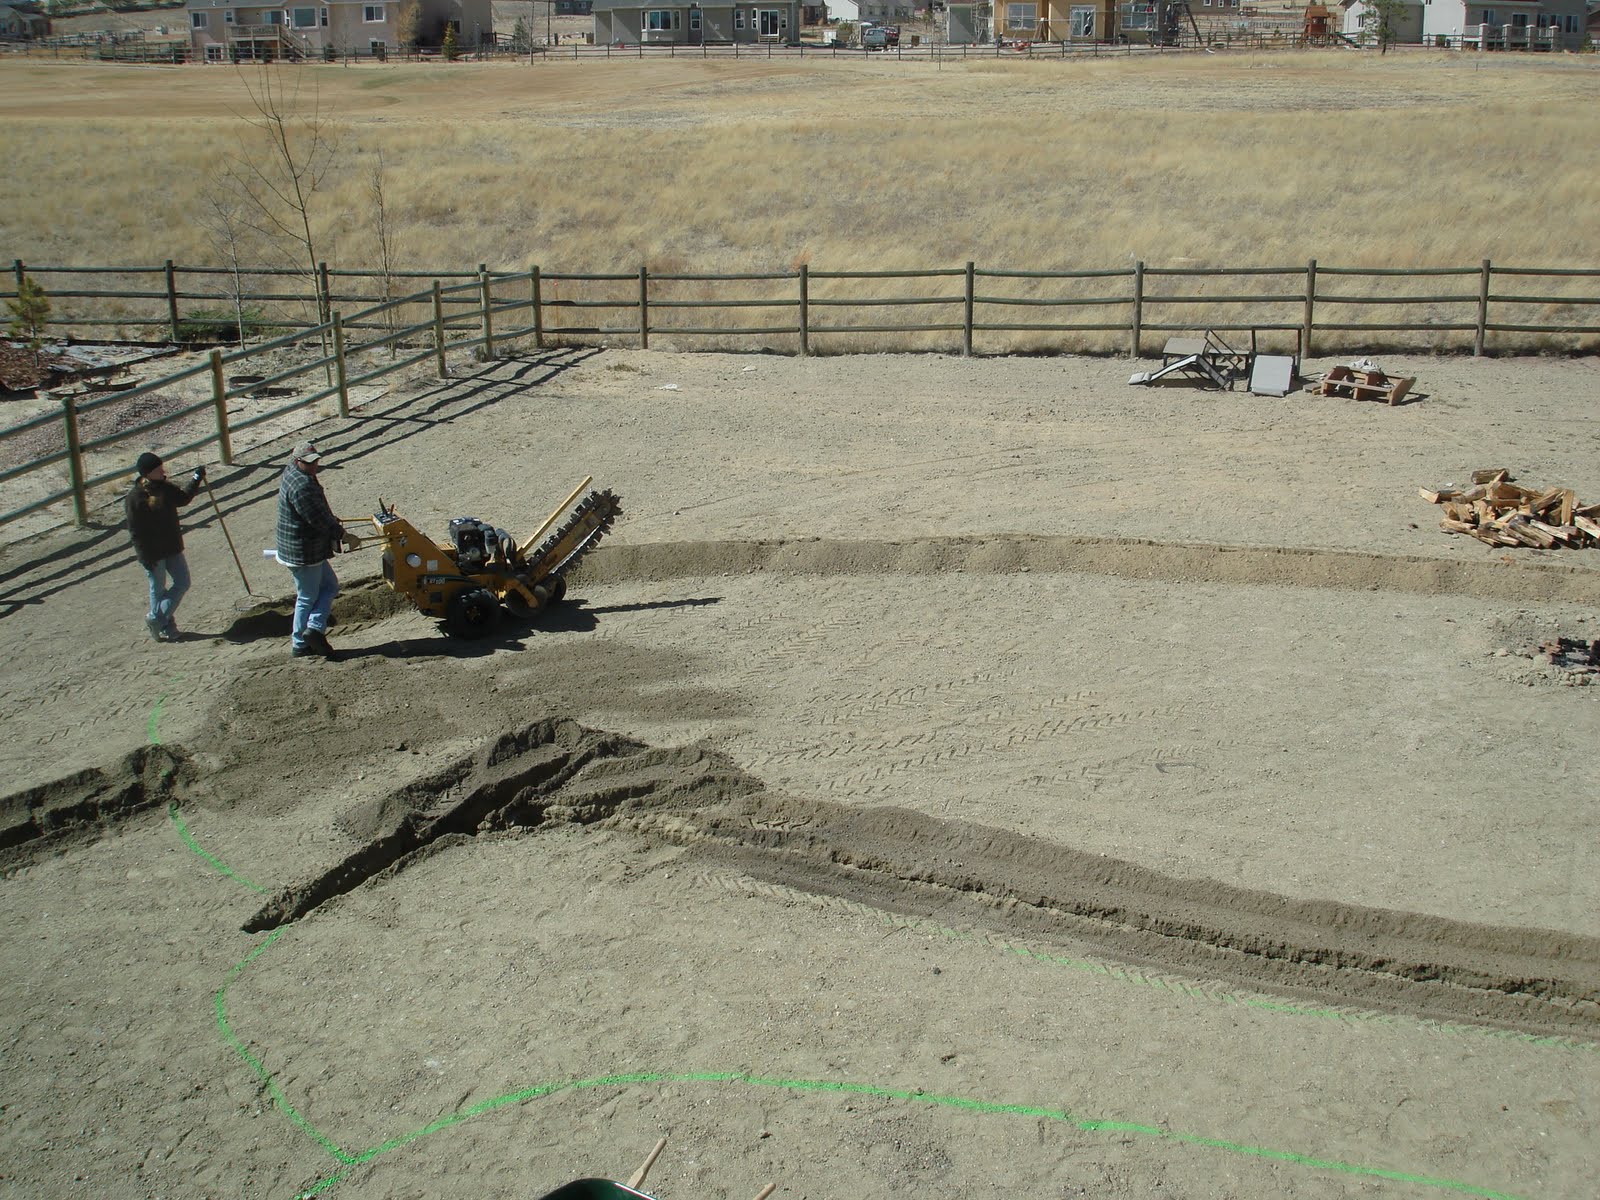
Our first goal was to get the sprinkler system in place..the trencher was a life saver..the ground is dry and almost frozen, it was like digging in concrete. There would be many discussions about the exact placement of the lines in the ground. Jason left it up to me to measure out what would be our future yard..this proved to be quite a challenge.

The kids are getting a lesson on using a propane torch..the pvc tubing for the sprinkler was cold and brittle..the only way we could get it to bend was to heat it up with the torch

Irrigation system done..now to the deck. We were determined to not have a yard of concrete and rocks..here in the high desert, you are allowed 2500 sf of grass...hmmm, our lot is almost 14,000 sf. Lets build a wonderful outdoor living space! So, the 18 ft x 24 ft deck came into the plans. We used a LOT of concrete to pour the footings and made the poor children pour it into the sonna tubes (notice my construction lingo...lol..I learned so much from this experience..hee hee). I mostly used the kids as comic relief..those two are so much fun!

Next comes beams and joists..talk about heavy lifting and lots of using levels

Cats are in..we couldn't do a simple deck design..had to be the hardest one~ picture frame..then we screwed in about 1000 hurricane clips to hold all the pieces together.

Finally the deck boards can be placed! Progress!

Jason installed low voltage lights in the deck steps, all the way around the deck

This is the egress window well from the basement...had to have access out of the house in case of a fire. Jason designed the area around it so the grate would sit flush on top of the deck..Wonderful job!

Deck just about done..moving on to the flagstone and pavers..Jason drove the bobcat and leveled the dirt 
Our new fire pit pavers are in and the flower bed behind it too!

The flagstone ended up being quite difficult and HEAVY..we had 4 tons delivered and covered 400 sf..trying to stay with the grade of the lot proved to be a challenge

The deck is done..over 50lbs of screws were needed..

We were going to wait on the hot tub, but found out they would have to use a crane to get it over the house because once we were finished with the yard, there would be no access to the back with a vehicle. Friends beware..if you ever use concrete coloring, read the directions very carefully. If you don't, your supposed to be brown concrete slab will be mauve!!! good thing a hot tub will be covering this up..lol..

We can't neglect the front yard...this is 3 tons of ledge rock for our little wall

Ok, next project is the outdoor kitchen area... we love to play outside, eat outside (especially in CO, there are no mosquitos to eat you alive!) and grill our food. We designed this area to accommodate these needs. The foundation was more heavy lifting and terrible abrasions..we learned the hard way to use rubber gloves when working with mortar..the concrete got into our heavy cloth gloves and rubbed between our fingers raw.

space for the refrigerator and a cabinet door

We're half way there!

Jason worked on some other projects while I applied the stone veneer..a messy puzzle.
 Jason had a great idea to incorporate an umbrella into the counter top; so we poured concrete around the tube to keep it stablized and the umbrella can be removed at any time..it just slides into place and even tilts!
 Jason had to head to TX for 2 weeks to complete his SGM course..time is running out and we can't put the project on hold, so time for me to learn some new stuff! I purchased a bagster bin and filled it to the brim with all our construction debris that had been piling up in the back yard
Finally, the hot tub arrived. It was supposed to be delivered prior to Jason leaving for school. I hadn't been to the spa store, so when it arrived..I was happy to see it. To my surprise, I received a call the next day from the spa manager telling me they had delivered the wrong hot tub! They exchanged them while I was at work..once it was filled there was a leaky connection, which required the repairman to come out twice, having to drain and refill the tub once. What a fiasco!

Now that the hot tub was in place, I could get the soil ready for sod...I learned to drive a bobcat and over the weekend spread 30 tons of decorative rock and 15 tons of compost

I even let the kids have a turn at it..Hunter was very serious about his job and picked it up very quickly..he promised to continue helping if I let him drive a little more..he was able to finish the last bit of rocks..backing up in this tight area on the side of the house was very tricky..he was not happy that I wouldn't let him do it.
 Ashley had a great time driving..it took her a few minutes to pick it up, but she had a lot of fun helping move the compost around
The next task was getting the compost tilled into the soil..I fought with the tiller and won..after leveling the soil with the rake, the yard was ready for sod

Everything was in place for the sod to be delivered..can't wait for some GREEN!


I couldnt sit still just waiting for the sod, so I got the tile on the counter, sealed it, stained the counter edging and sealed the veneer..LOVE the comfortable bar stools..the kids and I eat out there a lot.

We wanted to tie the grill area into the deck space, so we used the same stain from the deck treads on the edging..the backsplash and center strip in the bar counter have the slate accent.

Party time!

How I love the green!! The kentucky bluegrass sod is beautiful!

Almost to the finish line..just waiting for plants now

We placed flagstone stepping stones through the grass to the fire pit area.You can see the begining of our horseshoe area in the far right corner

The two tier flower boxes turned out really nice..some color added to the deck space

we love the beautiful yard...we've been staring at dirt for almost 8 months!

the small side yard has a ledge rock retaining wall, stepping stones to the back and a small grass area..we had to have some green over here too!

View from the garage side of the house...plants are coming soon!


